Greetings and HAPPY NEW YEAR! May your new year be filled with new exciting adventures and personal growth, as well as much love, joy, and peace :) I'm blessed to know you and your growing artists.
Speaking of growing artists, let's take a look to see what each grade level has been up to lately...
Kindergarten artists completed their Prehistoric Style Sketchbook Cover Designs at the beginning of December. This was a first time attempt with students and will definitely be something I revisit. It was a great lesson in teaching students basic skills such as hand tracings (for many it was their first time), overlapping, storytelling through observational & imaginative drawing. The students watched a video to learn what prehistoric art is and considered questions like: why and how did the earliest people make art? It was amazing how thoughtful these young artists were with their answers. They had an early realization how valuable art is to us as people... we're creators at our core! After drawing all of our designs with chalk pastels (to closely mimic the materials the cave artists used), we painted a layer of mod podge over our sketchbooks to give it a protective and shiny coat!
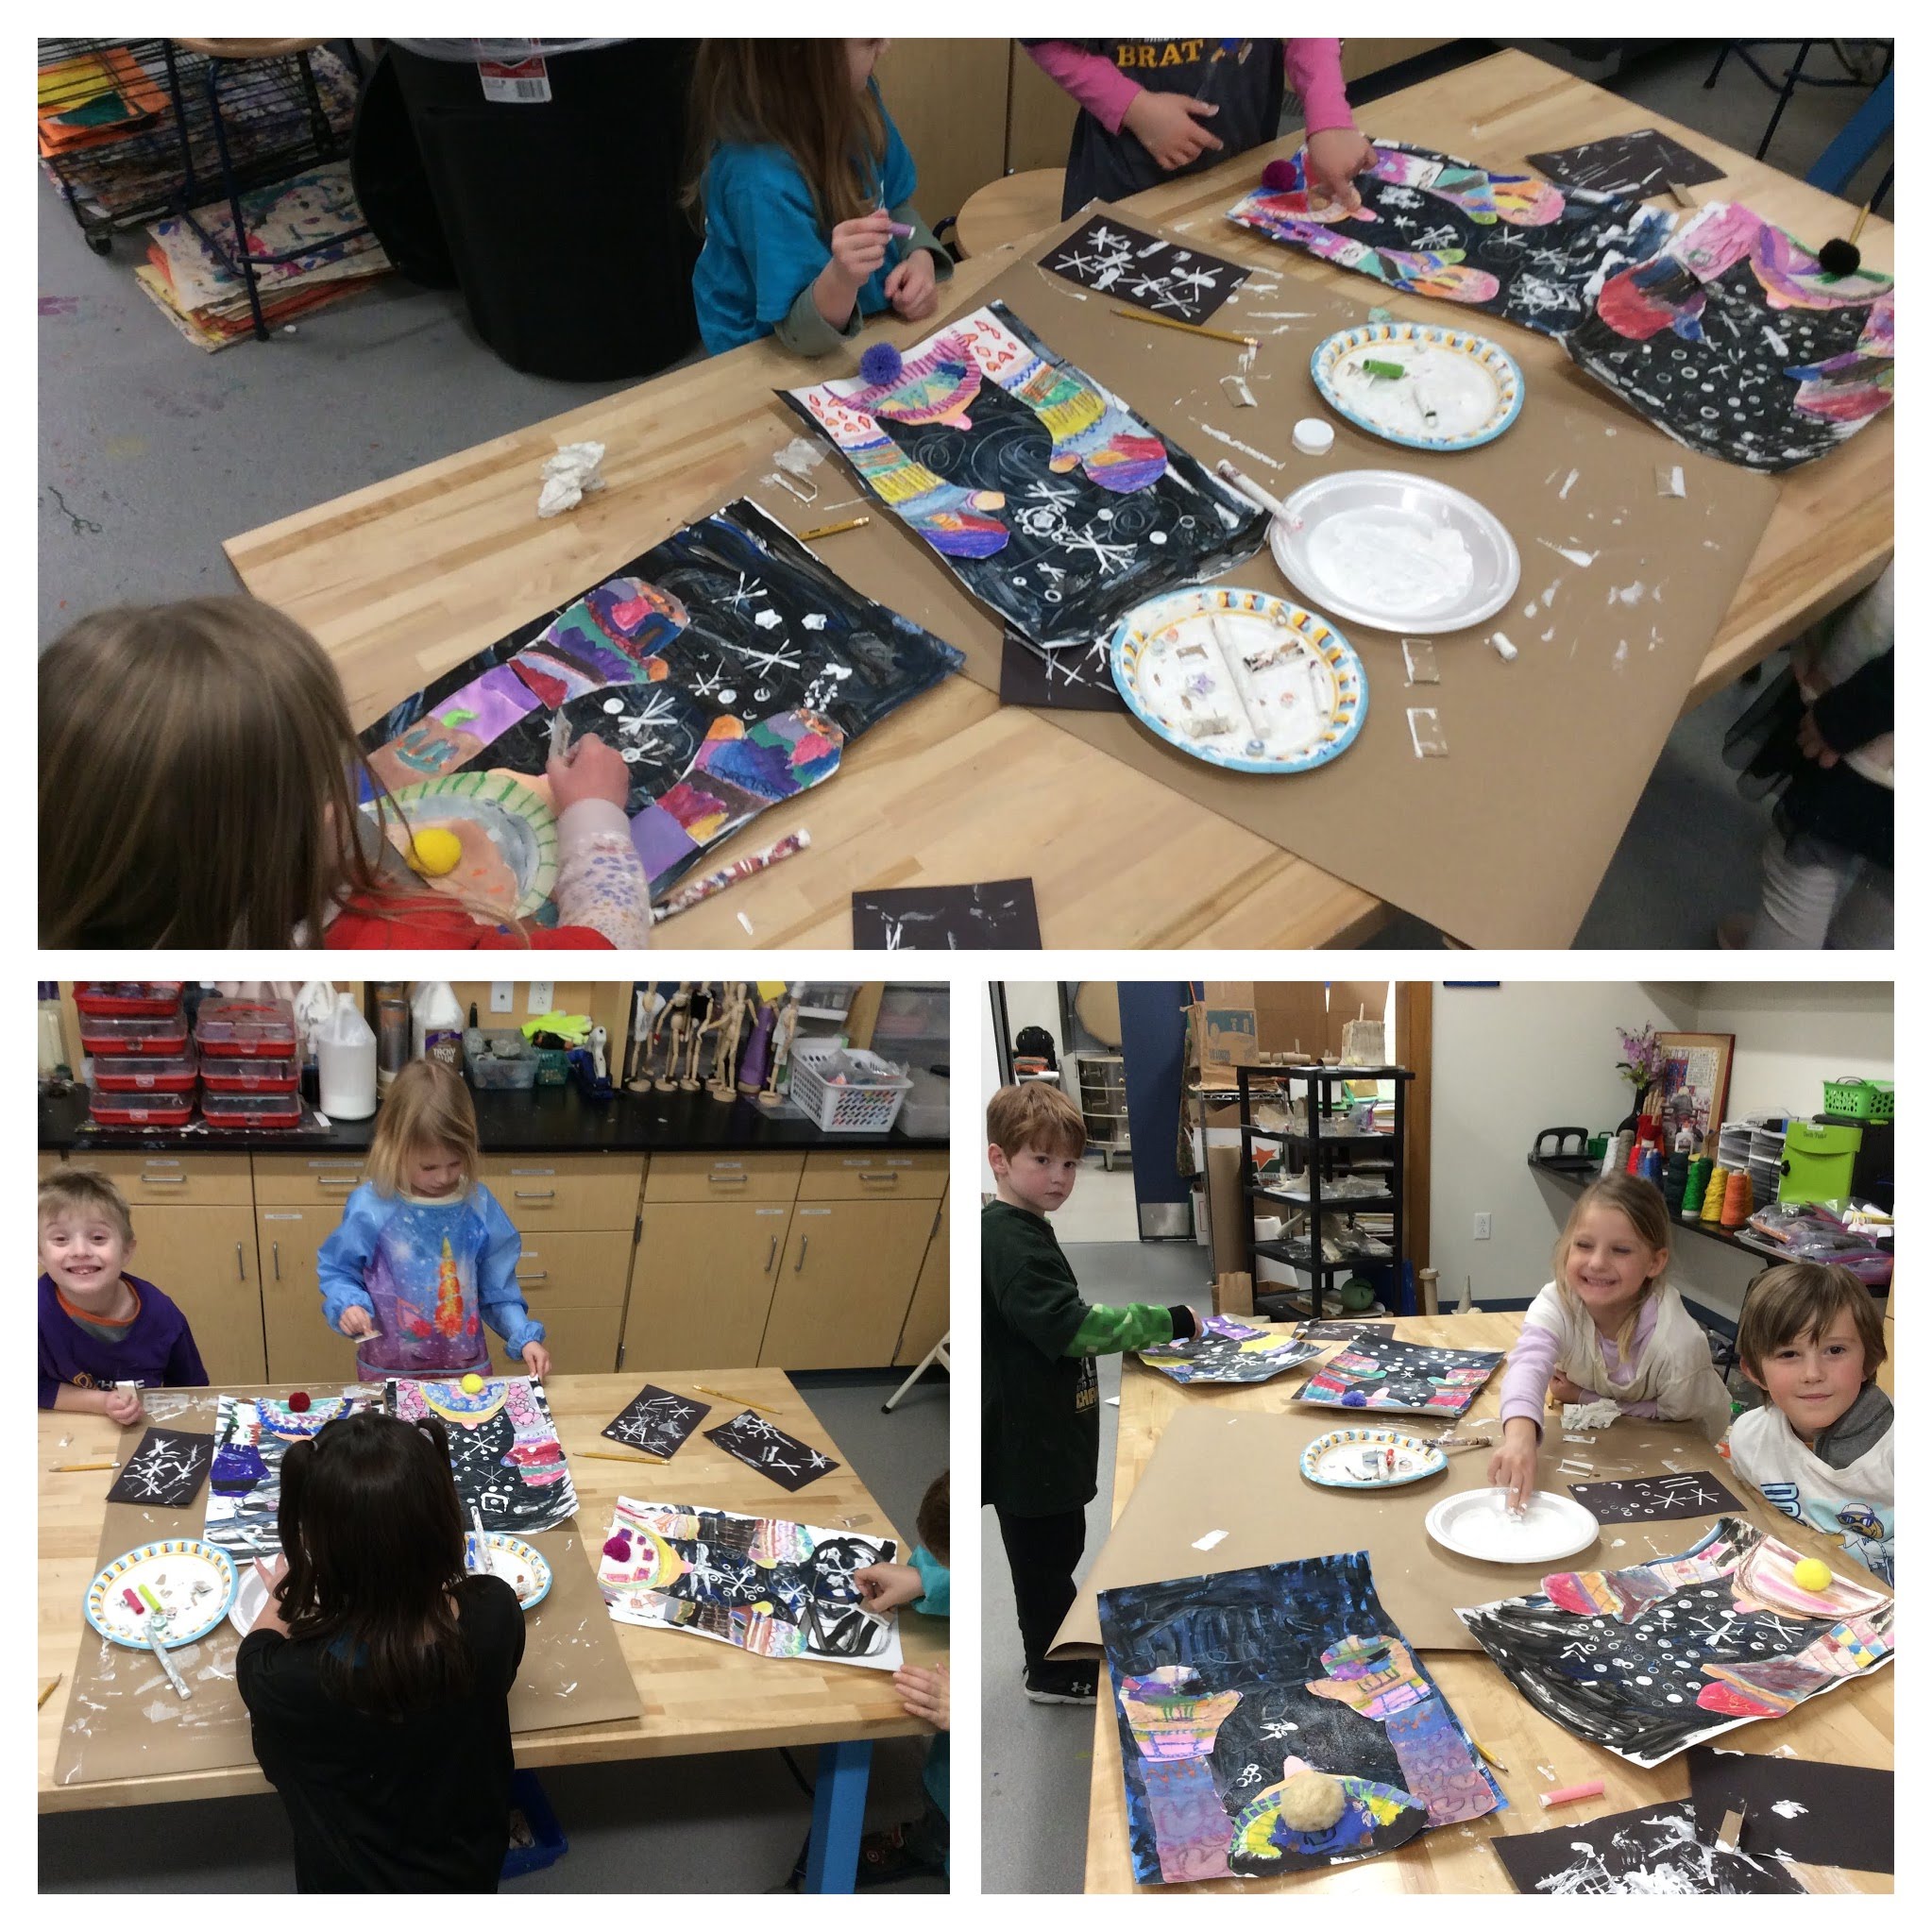
Next, the kinder artists moved on to their Catching Snowflakes artwork! This adorable artwork involves so may parts and covers a wide variety of art making skills. We first enjoyed reading the book, "Snowflakes Fall," by Newbery Medalist Patricia MacLachlan and award-winning artist Steven Kellogg. The students then painted a dark night sky with blustery winds. They painted large brush strokes of black and blue and then drew lines into the paint with cue tips or the back of their brush to represent wind. We then started to design the snow gear that the students will be wearing in their self portraits (mittens, a hat, and a jacket). The mittens were the most fun since the students had the challenge of making them symmetrical with their line designs. They were asked to add a minimum of 5 types of line, and 5 oil pastel colors. They then painted in the open areas with tempera cake paints. The sleeves and hat followed using a similar approach to create a matching set. Soon, we will cut, arrange, and glue the pieces together, while also printing snowflakes in the background. Maybe we will actually have snow by the time our artwork is done!
 |
| Sharing their artwork with classmates! Students were instructed to share their favorite parts of the cover designs :) |
 |
| Drawing, mod podging, and having all kinds of fun :) |
 |
| Painting a huge paper with back and blue paint... what could go wrong?! Haha... They actually did a great job and made a much smaller mess than expected ;) |
 |
| Check out those awesome one of a kind mitten designs! |
 |
| We talked about how our paint needed to be watered down so the "bossy" oil pastel could win the battle. The oil pastel says to the paint "don't go here paint, I was here first!" |
First grade artists completed their fantastic Scarecrows with David Hockney Inspired Backgrounds! In order to create the scarecrows, the students used paper templates as a guide by gluing them on the back of wallpaper and other specialty papers. The artists were asked to add two accessories beyond their tops and bottoms. It was so fun to see the students get creative with this. There was a wide variety of features added including: purses, hats, skateboards, earrings, and animals to accompany the scarecrows! To finish up our artwork we added designs like straw, a facial expression, pockets, stitches, and more. Of course we completed our artwork by signing and dating it. One first grader used their smartwatch to add every bit of info to their artwork, down to the second (so funny... love it)!
The first grade artists moved on to snowmen! We very much enjoyed reading the book, "Snowmen at Christmas" which gave us great inspiration for our Snowman Oil Pastel Drawings and soon to be Clay Snowmen! The students enjoyed the draw along that included drawing with oil pastels on back paper (such a neat effect)! This allowed us to show high contrast and think about lights and darks (with the moon being the source of light in our drawings). These quick and adorable creations deserve a frame! :)
To wrap up the month of December the first grade artists got to play with playdough as preparation for our Clay Snowmen! They practiced making pinch pots, coils, and extra features. Soon we will be discovering (or remembering) the difference between playdough and clay when the students start their final artwork! What a fun and educational experience for the students to begin with creating two-dimensional artwork then transition to a three-dimensional artwork out of clay!
 |
| Scarecrows in progress :) |
 |
| Nearly complete! Check out that awesome time stamp in the bottom right ;) The students were asked to add the year, and this student went above and beyond, haha :) |
 |
| Some Free Choice Art creations when we had time to sneak it in! |
 |
| Practicing with playdough! Check out how long those coils are... impressive! |
 |
Snowmen on display in the art room windows!
|
 |
Mrs. Carpenter's class showing off their Snowmen Drawings! :)
|
Second grade artists are nearing the end of their Pop Art Paints and Palettes! The only thing we have yet to do is shape and add the air dry clay for the "paint" coming out of the tubes, glue down the paint tubes, and sign our artwork! While we wait on the model magic to be ordered and shipped we will be pausing our current project to start designing our clay project! More about that in a moment...
Back to the Pop Art Paints and Palettes, this project has taught the students so much! It has included learning about two different Pop artists, Romero Britto and Andy Warhol, designing and creating paint palette relief prints with foam, enjoying the printing process using four different ink colors, constructing a 3-D armature for a "paint tube" out of an empty t.p. roll and masking tape, paper macheing with ooey gooey paper mache paste, painting, naming, and podpoding the paint tubes, and soon forming air dry clay into "paint." Wow! Such a fun project that the students seem to really have enjoyed :)
Our clay project in 2nd grade will be (drum roll please...) Clay Picture Frames! This project was inspired by a clay picture frame that I made as an art student in 3rd grade. My Mom still has mine, my brother's and sisters, on display :) These will be uniquely designed hand crafted frames that involve a variety of clay making techniques! Stay tuned for the next update to learn more about the art making process! See you then!
 |
| Paper macheing our paint tubes! I asked the students to make a facial expression to show how they felt about the art making process and slimy (dog drool) like texture! |
 |
Such a mix of reactions to the paper mache paste! Haha!
|
 |
The printmaking process was a HUGE hit with everyone. We would all agree it is super addicting!
|
 |
| Paper mache paint tubes! The students had fun writing the names of the paint colors! :) |
 |
| Pop Art Paint Palette Prints! |
Third grade artists finished up their Holiday Lights Watercolor Paintings just in time for winter break! These are stunning and oh so colorful! Not only were the paintings so much fun for the students to make, but they learned a ton about color theory and coloring mixing using watercolors. The challenge was not just to know which two or three colors mix together to make which color, but project also require that the students know how to use liquid watercolors which can be hard to tame and are not the most forgiving with mistakes. While there are many examples of a "beautiful oops," they are still beautiful works of art made with a lot of time, effort, and love :) Oh, and a favorite part... adding the "string" at the end! The students had a choice between yarn and glitter! I heard more than once that glitter is not allowed at home, so many students were excited to have that as an option (haha)! :)
We are now moving onto CLAY! The students were just introduced to the project, Clay Canopic Jars! We will be connecting their artwork to the Egyptian unit they study in 3rd grade! We took time to look at examples from last year's 3rd graders to see what the students decided to add as their Canopic Jar head. The artists will have a fun challenge of creating their own head for the jar, rather than using one of the four traditional heads (human, baboon, jackal, and falcon)... although those are still options as well. The students were directed to choose a head that has significance to them and represents their personality in some way. We'll see what they come up with!
 |
| Students observed two different painting techniques they could use for the background... "exploding colors" and salt, or splatter painting. |
 |
| Snuck in a class reward when they filled up their class palette. "Free Choice Art" is a popular vote! |
 |
| More Free Choice Art creations! |
 |
| Some gift tags and thank you cards were an option for students who finished early with their Holiday Lights Watercolor Paintings. |
Fourth grade artists spent a couple of weeks on two different projects. Students at Westlawn painted their Clay Canopic Jars that they created last year (and they turned out SO cool)! NEW Westlawn students who weren't at Westlawn last year had the opportunity to paint anything they wanted with a little guidance and help. Both sets of students were asked to focus on recreating realistic colors and textures with their chosen animal, creature, or object. This proved to be a challenge for many but many students impressed themselves with what they could create when they played around and experimented with different tools and techniques!
Parkview fourth graders dedicated a couple of weeks to learning two types of contour line drawing (regular contour and blind contour). They practiced in their sketchbooks while following along with an excellent demo video from an artist, and then created two final copies... a regular contour self portrait in which they placed a clean sheet of paper over their printed school photo and traced without picking up their pencil the whole time and the other version was a blind contour self portrait in which they looked at them self in a mirror (or their printed picture) but were not allowed to look at the paper they were drawing on, and also weren't able to pick up their pencil. Both versions turned out awesome! We then took the blind contour portrait and turned it into a monochromatic painting (many tints and shades of one color). Students made value scales with their one chosen color and painted in each a shape a different value of that color. I love them so much!
Now the 4th graders from both Westlawn and Parkview are in the midst of a super fun sculpture project... Paper Mache Puns and Idioms! The students may have mentioned this at home, or even asked to bring in certain materials for their project (which they were welcome to do if I didn't have what they needed). We spent the first class brainstorming and planning out or projects, considering what materials would be needed, what steps would need to be taken to make the artwork, and what the 3D artwork would look like (students made sketches to plan this out). We are now nearing the end of the armature stage in which the students create the underneath structure (skeleton) to support the paper mache. We can't wait to show you the finished products for the next art update! :)
 |
| Finishing up the Clay Canopic Jars! |
 |
| Parkview 4th graders painting their blind contour portraits with a monochromatic color scheme! |
 |
| Look at those cool looking value scales! :) |
 |
| Making armatures for the Paper Mache Puns and Idioms! |
 |
| Lots and lots of masking tape and other random building materials were used in the process! |
Fifth grade artists have been busy and taking part in some awesome art making processes! At the end of November they completed their amazing sketchbooks by adding a binding using pipe cleaners. They learned two types of stitching methods (whip and running) and chose one for their binding. The fifth grade artists were then introduced to the art of paint pouring in which they made an Acrylic Paint Poured Frame. These were created by masking a square paper with cardboard, filling up a small plastic cup with layers of watered down acrylic paint, flipping the cup and moving the paint around by tilting the surface and using a variety of other techniques. Students experimented with dragging the cups, drawing through the paint with a cue tip, scraping through the paint with a textured paint scraper, blowing the paint with a straw, stamping the paint with found objects, and splattering the paper with leftover paint in the cups. Once they saw the love demo of how to do it they were instantly hooked and couldn't wait to do it themselves! The process is similar to glazing pottery in that you don't know exactly how it's going to turn out since there is some mystery involved in how the colors will interact and flow. It is also an art process that is easy to over-do if you over mix the colors. There were a few students that had regrets about this and chose to give it a second try. They turned out just amazing and were so fun and easy to make!
We have now moved on to creating the inside design for the frame which will be 4 repeated linoleum relief prints! The students came up with their own designs and are now in the process of figuring out what parts to carve away. A good quality print will be a balanced design of positive and negative space, have an interesting composition (how they lay out their design and use the space), and include lots of lines to create texture and interest. The linoleum block will also be used for an additional project that students will work on at a later time (Elements of Art Accordion Books). Can't wait to show you their progress in our next art update! :)
 |
| Some 5th grade boys showing off their awesome sketchbooks! |
 |
| The students completed a reflection sheet for their Sketchbook project, which included a self reflection and peer feedback. It also contained a papermaking quiz on the back to test their knowledge of the steps for making paper. |
 |
| Acrylic paint pour! |
 |
| Love the action shots! |
 |
| Manipulating the paint using a variety of methods and materials. |
 |
| Stunning! |
 |
| Drying time... had to get creative with where to hang them! |
 |
| Parview 5th graders give it a go! |
 |
| Now Thorson 5th graders! Absolutely beautiful results and such a fun process! |
 |
| Practicing lino cutting using the gouges and easy cut linoleum! |
 |
| A BEAUTIFUL artwork made by one of our talented artists during Free Choice Art one day! :) She experimented with stamping the bristles of the paintbrush for the leaves and petals. Lovely! |