Sunday, May 1, 2022

March & April Art Update!

Hello artists and families! In this combined art update, you'll see many of the classes continued to build on complex art projects that started in March and continued into April. The younger grades (kindergarten and first) completed projects and started something brand new! 

We also sprinkled in some Easter and Earth day art activities for some classes, and celebrated TWO art shows in March and April! Below are a couple pictures of the artwork displayed art the Cultural Center. To see pictures of individual students and their work please click on the "Art Show" tab, or click HERE


Enjoy looking through pictures and descriptions of all of our latest art happenings below! :)

Kindergarten artists completed their awesome Kandinsky Inspired Circles by showing TWO types of sewing around the border of their paper. In order to practice the two types of sewing ("running" and "whip/edge" stitch") the students used lacing cards. These helped a TON and prepared the students for sewing on paper. In order to choose the colors of yarn, the artists were instructed to choose oppositie (or complimentary colors) on the color wheel. The mixed media artwork looks AMAZING and I could look at each of them for hours. What a great opportunity for the students to explore a variety of art materials and methods (painting, drawing, gluing with glitter/sand/sequins/foam, and sewing with yarn).

Finishing our mixed media Kandinsky Inspired Circles!

Practicing our sewing skills for the border or our artwork!

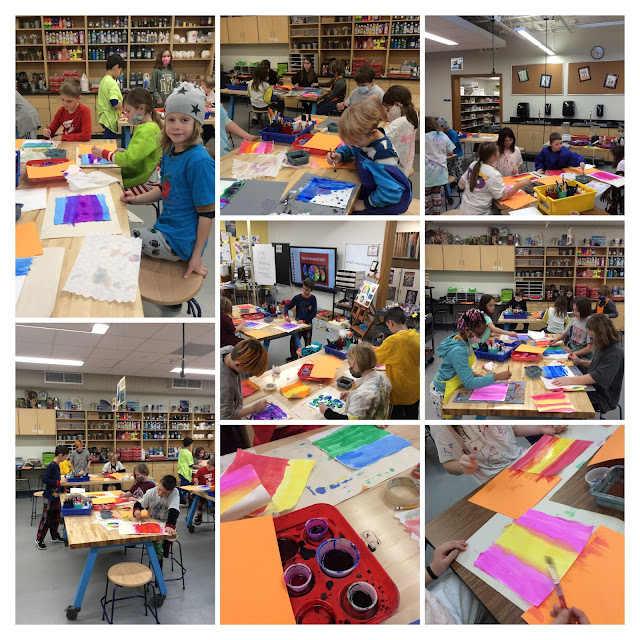
For our next project, we are creating one of a kind robots made from cardboard and tin foil! The backgrounds were made by doing crayon rubbings over wooden gears. The students then painted ANALOGOUS watercolors (neighboring colors, unlike the opposite colors they used for the last project) over the gears. Prior to creating their robots, the students completed a fun coloring sheet in which they needed to color in a key for a robot and identify the same shapes for each color. This prepared the students for the next class, which was to start designing their own robot using the cardboard and tin foil. Soon, the students will complete the robots and use it for another crayon rubbing!

Creating the background for our robots. Students first practiced the crayon rubbing of the gears in their sketchbooks.

Coloring in our robot shape coloring sheets. Students colored in their own key so all the robots were unique.

Creating their own one of a kind robots using cardboard and tin foil for the main robot shapes.

First grade
artists added some sewing to the border of their VanGogh Inspired Paper Batiks! The students used the "running" stitch to go up and down the holes all the way around the border. They are now complete! After the Batik project, the students began making backgrounds for their Kimono Self Portraits. The artists had fun using a new masking technique by painting around a cup to create a moon. they filled in the rest of their paper with blue water color. Once dry, the students drew and painted a tree (after having practiced in their sketchbooks). The BEST part of the tree making came when the artists were given straws and taught how to do blow painting! They were so curious how the would be painting branches without the use of their hands. They learned how to love the paint with air!

After the trees dried, we painted cherry blossoms by pressing down our paintbrushes 5 times in a circle. The bristles of the paint brush resembled a petal on a cheery blossom, so stamping the brush worked great! We are now enjoying starting the Kimono portraits by personalizing our skin color, hair color, and hair shape! The artists learned to draw their hair shape in their sketchbook and will soon cut out that shape on construction paper. Soon, we will be dying our kimonos (which are actually coffee filters died with marker and watercolor :) 

Completing the running stitch on the border of our VanGogh Inspired Paper Batik!

Enjoying blow painting as the students create smaller branches on their cherry blossom trees.

Adding the cherry blossoms!

Creating our hair shapes as we start our Kimono Self Portraits!

Second grade artists completed their Pop Art style prints back in March. They LOVED the relief printing process, especially the chance to print with 4 different colors. The wonderful thing about the relief printing process, is that you can reprint using your foam plate (like a stamp) if one doesn't turn out! The paint palette prints were inspired by Pop Artists Andy Warhol and Romero Britto.

Printing our Pop Art inspired backgrounds!

The next steps was even more enjoyable for many of the students, making paper mache paint tubes! The students took two empty toilet paper rolls, pinched and taped one end, and then cut, folded, and taped the other end to resemble a real paint tube. Then came the ooey gooey paper mache process! As happens most year, some students LOVED the feeling of the paper mache paste (which feels like slime or gel), and other students could barley stand the feeling and wanted to wash their hands immediately. Whether they loved it or tolerated it, all of the students did a nice job dipping the strips in the paste, using "finger scissors to get off the excess slime, and then smooth it on the paint tube. The next step will be painting and completing the illusion of real paint tubes!

Easter themed how to draw artworks of the students' choosing!

Creating our paper mache paint tubes! Check out some of the reactions to the paper mache paste! I LOVE the picture of Addalie and Isla... can you tell which one of them loved it and which hated it?

Starting to paint our paint tubes! Students used a masking technique to keep parts white.

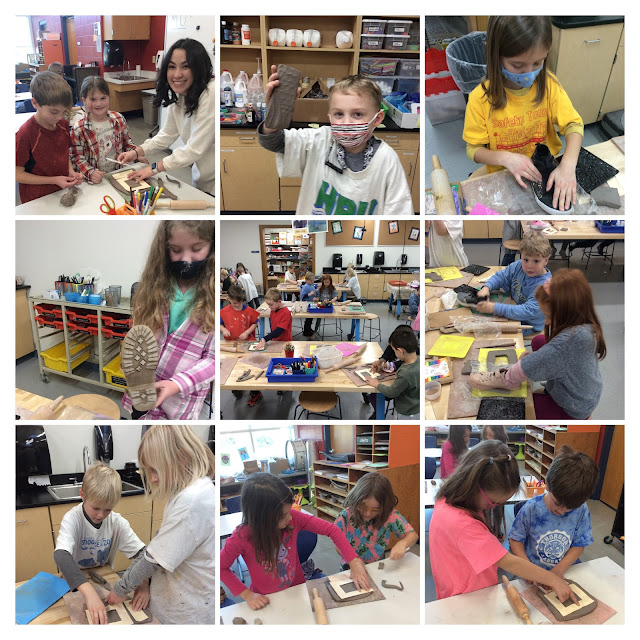
Third grade students have been hard at work on their challenging and unique clay loom projects! The tricky clay making process required that they students roll out a giant slab of clay from recycled clay (without cracks or air bubbles). They then used a template to cut out the outside and inside circle. With the use of straws, the students removed small holes where the string would be threaded through to make a warp. 

Once the clay was in the leather hard stage (between wet and dry) the students glazed every other section and prepared to transfer their chosen designs into the clay. Back in March, the students chose a black and white picture that represented their personality or something theur liked. They thn learned to edit the picture so that half of the picture flipped the black and white spaces (to show positive verses negative space). This was a tricky process, but the students learned a lot and seemed to enjoy the digital side of art making. We are now attempting to recreate the designs in clay by learning two different clay design techniques, sgraffito and free hand painting. On the side with the negative space, the students will carve away the top layer of glaze to expose the clay underneath. On the side with the positive space, the students will paint on glaze to show space being added. Although none of the looms are perfect, the students are learning a lot and having fun in the process!

Creating circular clay slabs for our clay looms! Not an easy task!

Adding our positive and negative space designs! One side is subtracting glaze using the "sgraffito" technique, and the other side is adding glaze by paint on the other half of the design. Once again, not an east art technique but a fun challenge!

Earth day art activities of the students choice!

Fourth grade artists have been enjoying designing and creating their sewn stuffies! Back in March they started the design process which required that they envisioned and sketched out 3 different ideas. They could choose anything, and naturally the students chose a theme that represented their personality and something they liked. After creating the smaller sketches, the students drew a more polished sketch on a full sheet of 9X12 paper (this became their "pattern"). The students then got to select a colored or patterned piece of fabric that would become the backside to their stuffie (they loved this part). They thought it was pretty awesome that you can make one cut and tare the fabric making a straight edge (since the fibers are woven straight). Once they had their pattern pinned onto their plain muslin fabric as well as their colored fabric, they cut out the pieces together.

The students have now started to sew! We are using the whip (or edge stitch) to sew all the way along the perimeter of the fabric. The students are learning to use tools like a needle, needle threader, and thread. They are also learning sewing basics such as how to tie a knot, and what to do if things don't go as planned (there has already been plenty of this)! Once again, creating art is teaching these kids so much more than how to make a cool looking project. They are learning problem solving, perseverance, a growth mindset, self expression, and of course a unique art making process that could be the start to a favorite new art media and hobby! We can't wait to show you the next steps of paint, and stuffing, which are right around the corner!

Artists designing their patterns for their sewn stuffies!

Selecting specialty fabric for the back of their stuffies. Students got to choose from patterned or solid colored fabric to compliment the front of their design.

Sewing! The first class was a challenge for many, learning so many new techniques (threading a needle, tying a knot, etc.) but they persevered and caught on fast!


Fifth grade artists are thoroughly enjoying every phase of making our clay cakes! Back in March the students began the planning stages of the project and compiled images of inspiration onto a Google doc. They needed to consider what the inside of their slice would look like (how many layers? what types of textures and flavors?) as well as the back of the take and the top. The topper of the cake is meant to be a show stopper and demonstrate a variety of clay making techniques the students have learned in grade K-5 (pinching, coil making, slab making, texture, and of course the "4 S's:" score, slip stick, and smooth... in order to successfully join clay together). 

The student began the clay making process by rolling out slabs (flat pieces) of clay and cutting the 5 pieces to fit the paper templates. They then got to designing, first the side pieces, then the back piece, and finally the top piece. The artists are now seeing the cake come together by joining 4 of the 5 with the top piece being a removable lid. Every year, I continue to be blown away at the students creativity and skill level. They are loving the process and they can't wait to paint them after they have been bisque fired in the kiln... very soon! 

Clay cake sketches. The students had lots of fun brainstorming and planning ideas!

Rolling out and cutting slabs!

Taking a one day break from our clay to do a free choice earth day art activity! :)

Back to designing and WOW are they looking great!

Check out those AMAZING clay cakes!!!


Tuesday, March 1, 2022

February Art Update!

It has been a busy month in the art room as students complete artwork and prepare for art show season! Our first art show will be coming up at the Cedarburg Cultural Center later this month in which 50 pieces of my students' artwork will be on display, along with many other artworks from the surrounding community. Stay tuned as more information on that will be coming soon!

Enjoy looking through pictures and descriptions from each grade level below...

Kindergarten artists completed their Catching Snowflakes projects, just in time for the snow we received! The young artists learned some neat facts about snowflakes, that they have 6 points, how they are made, and that each of them are unique like they are! They then enjoyed creating their own snowflakes by stamping a variety of found objects with white paint. I traveled around the room like Tinkerbell sprinkling glitter on the wet paint, to make the snowflakes sparkle :)

The kindergarten artists are now beginning a new projects, one of my favorites, Kandinsky Circles! The students enjoyed learning about artist Wassily Kandinsky and his style of abstract art. They also learned that he had a unique ability to hear colors and see music which very clearly effected his art making. As we began creating our artwork inspired by his piece "Squares with Concentric Circles," the students got to use foam building blocks to print 12 different colors that they would see on the color wheel! Soon they will enjoy a variety of art making methods to add more colors and textures to their Kandinsky inspired creations!

The kinders enjoyed reading the book "The Noisy Paint Box" and then created a sketchbook entry inspired by the book. The bottom picture is Annalie using a glue bottle as a "microphone" asking her classmates what they thought she drew. We turned some of their drawings into a guessing game and did show and tell under the document camera.
Printmaking with 12 different colors! We had fun riding on the print train... when the students completed a color I blew the whistle and they moved onto the next set of colors!

First grade artists are nearing the end of their VanGogh Inspired Sunflower Batiks! They have the opportunity to create a fabric batik and a paper batik which involve unique processes but share the same idea of protecting the art making surface with some sort of material. In the case of the fabric batik, the glue lines are protecting the fabric where the artist wishes the lines to remain white. The paper batik is protected with crayon and then will be crumpled up, smoothed out, and then painted with watered down black paint. The paint will then settle into the cracks giving it a "crackled look." 
The fabric batiks are MUCH more time intensive in that they need to be ironed, washed out, ironed again, and then wrapped around cardboard. I would like to give a HUGE shout out to my dependable and ever so helpful room parent (Mrs. Trost) for the countless hours she has put in to help me with the prep!
The students also enjoyed creating "ornate" picture frames to complete their beautiful VanGogh Inspired Batiks. Using cardboard and glue the artists attempted to create symmetrical line designs that would mimic the style of a fancy frame. After the glue dried, they enjoyed painting over it with metallic paint! One student said, "I hope my mom doesn't flip over my artwork because she'll know it's real cardboard!" Our goal is to trick people into thinking they are real metal frames ;)
Using liquid watercolor to paint our fabric batiks!
Coloring hard until our hands hurt, in order to create successful paper batiks!
Creating our ornate frames, first with glue then with metallic paint!

Second grade artists recently completed their fabulous Mixed Media Ocean Creature Mosaics inspired by artist Mary Wells. One of my favorite parts of the project was letting the students "Stretch and Explore" (one of our studio habits of mind) as they considered which additional art materials they would want to use to enhance their artwork and bring out some of the other textures and colors. Students got to experiment with adding sand, glitter, yarn, gems... they got to learn new techniques like splatter painting, sponge painting, and even printing with saran wrap. I encouraged the students to think creatively and have fun with the last step of the project! Hopefully you had a chance to see their Seesaw posts where they got to a do a "show and tell" with their artwork!
We are now beginning a brand new artwork, Pop Art Paints which is another mixed media artwork in the style of Pop Art! The students are learning characteristics of the art style as well as  studying famous pop artists such as Andy Warhol and Romero Britto. We are currently designing the palettes that will be printed behind our paper mache paint tubes, and the design process for the background involves drawing designs like Romero Britto and transferring their design to a foam plate that will be printed! We are excited to show you the progression of their work in the next art update!
Some beautiful and unique ocean mosaics! The students also completed reflection sheets (see bottom right) and Seesaw posts to show off their artwork!
After learning about Pop Art and artist Romero Britto, the students practiced drawing a paint brush and palette and added their own Britto inspired line designs!
On Valentine's day we had a chance to enjoy a fun how to draw video with tacos!

3rd grade artists completed their Warm, Cool, and Bonus Collagraph Prints this past month. Hopefully you had an opportunity to view their Seesaw posts showing off their artwork and what they learned. They learned and created a LOT with the art unit, and it's still not over! The students had their warm and cool prints cut up into strips which are now being glued to a template for a paper accordion. Once the strips are glued down in the correct order, they artists will accordion fold their paper and then mount that on a final piece of paper. When it is complete it will be a two sided optical illusion in which one angle will show warm printed designs, and the other angle will show cool printed designs! It will be SO fun to put them on display in the hall and see peoples' reactions as they walk past! 
Thankfully since the students were able to create one additional bonus print using colors of their choice, they will have one print that will not be cut up, but will instead be mounted on white paper, titled, and signed! :)
Completing our collagraph prints!
Arranging and gluing down our warm and cool prints that were cut up into strips! Next class we will complete the accordion fold as it takes the shape of an Agamograph!

Fourth grade artists are nearly done with their realistic "Chalk Pastel Self Portraits!" It has been a long learning process filled with lots of growth! The journey started when the students were asked to draw a self portrait in their sketchbook with NO help (a pre-assessment of sorts). They then broke it down into facial features and practiced each one from observation. We then drew a second self portrait learning the proportions of the face and lines of symmetry. That led us into our larger rough draft self portrait, which I took home half way through to make suggestions and corrections on each one, helping the students to understand where the lines of symmetry are on their face and how their features should be shaped. 
As we polished up our rough drafts the students learned how to use light boards to trace the rough draft to make the final draft (this time no extra lines, just lines they wished to keep)! Every student loved this process and enjoyed the ease of tracing! The students are now adding COLOR to their final drafts using chalk pastels and colored pencil! They are quickly discovering what the pastels are capable of and what they need to be careful of (particularly smudging and smearing)! We look forward to showing you the finished artworks next month, along with what we are starting for our next project!
A look back at some of the first portrait drawings in our sketchbooks and then they super exciting step of tracing our rough drafts to make our final drafts! 

Some final self portraits in progress!

Fifth grade artists are SO close to completing their amazing and unique weaving projects, which includes their handmade paper and awesome relief print! We are in the process of taking the weavings off the loom and soon we will be sewing the handmade paper into the weaving. The complex project has not only required commitment and perseverance from the artists but it has been VERY prep heavy behind the scenes. I have had multiple parents come in to volunteer as we worked our way through the unit, so thank you to each one of you! Also, a HUGE thank you to Mrs. Trost for spending the MOST time as she worked hard to cut and hole punch handmade paper, glue on prints, tape handmade paper to the backs of weavings, etc. My parent volunteers have been keeping me afloat this year and are allowing the students to get so much more done :) I am beyond grateful!
Enjoy checking out pictures of the artmaking processes and final products. The students absolutely LOVED the printmaking portion of our project and quickly became addicted. I told them they should limit their prints to 4 prints per student (to save on ink and paper), but I had students "accidentally" printing between 8 and 10! It was hard for me to be mad because that just meant that are LOVING the process and the range of prints that come from it. Some students had the opportunity to mix colors and that's when the addiction really set in! I was seen such amazing prints that I would consider high school quality, and they are simply made from a piece of foam!
Yay printmaking! The foam printing plates are pictured along with the prints. Look at that multicolored microphone... wow!
Some Thorson students enjoying the printmaking process (even though some don't look like it ;)

Way to go Jayden!

Finishing up weavings! It's so neat to see the completed weavings next to the original designs!


Tuesday, February 1, 2022

December - January Art Update!

Thanks for stopping in to check out the December and January combined post! With a shortened month of of school leading up to winter break, I figured we would just glide right into January with our art blog post.

Take a look at each grade level below to see what the students have been up to...

Kindergarten artists completed their Clay Cupcakes! The students learned a variety of basic clay making techniques including: shaping pinch pots, rolling out a long coil, creating a topper, and attaching the clay topper using the "4 S's" (score, slip, stick, and smooth). The students had a great deal of fun making the projects, and many of the older students were amazed (and some jealous) when they learned kindergarten students made them. 

After the clay had dried out, it was bisque fired in the kiln, and then painted by the students using tempera paint. We finished the scrumptious cupcakes by adding a coat of mod podge for shine, and real sprinkles for some added texture and fun :) Luckily, no students tried to eat them this year (usually there's at least one ;)

The students are now returning to a previous project we had started before break... Catching Snowflakes, a mixed media self portrait project of the students catching snowflakes. I like to read two books during the making of the artwork, "The Jacket I Wear in the Snow" and "Snowflakes Fall." The first book, connects to the designing of the mittens and all the winter gear that the child has to put on in the book. The kindergarten artists designed their own pair of mittens with oil pastels and paint, while attempting to make their designs symmetrical. The following class they enjoyed creating sleeves and a hat to become part of the matching set. 

Soon, we will be creating the background (a wintery night sky with large uniquely printed snowflakes) and then lots of cutting, arranging, and gluing will follow. We look forward to sharing our completed artwork soon!

First grade artists also wrapped up their clay making unit by putting finishing touches on their one of a kind snowmen (and women :)! The project is a step up from kindergarten in the clay making skills needed to make the artwork. The students needed to create three clay pinch pots (small, medium, and large) to be disguised as snowballs. They were then asked to give their snow person a headpiece and neckpiece, as well as a face. Many of the students went above and beyond and enjoyed adding extra features like snow friends, family members, pets... even snakes (for whatever reason we had a lot of snakes attached to the snowmen this year, haha). 

After adding holes into the sides of the snowman (for stick arms) and letting them dry out, the projects were bisque fired in the kiln, and ready to paint! We added a coat of white paint and then colored tempera paint for the creative colored areas. The students were encouraged to do color mixing and take their time as it was very easy to make messes on the clean white "snow." Lasty, the students enjoyed adding a layer of mod podge for shine and GLITTER for sparkle! Oh yes, and the finishing touch... adding in twigs for the stick arms :) We hope the snowmen will serve as fun winter decoration for years to come!

We are now revisiting a project we started previously, VanGogh Inspired Sunflower Batiks! The students have been studying artist Vincent VanGogh and learned to draw sunflowers like his famous paintings. We are now taking their drawing and using it to trace glue onto fabric that will be made into a batik! The students will paint around the glue and then once the glue is washed out, there will be white lines left behind which is the key characteristic of a batik. Many artists use melted wax, but glue is much less dangerous for our first graders :) 


Second grade artists enjoyed adding finishing touches to their Clay Picture Frames as we wrapped up our clay unit! This is one of those projects I teach that has a personal connection since I too made a clay picture frame in elementary school, and my mom STILL has mine on display, along with my sister and brothers. The students were encouraged to come up with a meaningful and unique design that also incorporated a variety of clay making techniques. All frames were made with a slab of clay that the students rolled out and cut into two pieces (the front of the frame and the base). They then were asked to add extra slab designs, coil designs, texture, and drawing. The students really had to be thoughtful and intentional about which design in their sketchbook would work best with the different clay making techniques. 

As with any clay artwork that joins two pieces of clay together, the students reviewed the 4 S's (score, slip, stick, smooth) in order to successfully join the clay. After the projects dried out and were fired in the kiln, the students had the opportunity to give their frames a totally different look with COLOR! We used "naked" oil pastels first by rubbing the side on the top surface of the clay.  The students then watered down tempera paint and let it settle into the deeper areas. They know the relationship between the oil pastels and paint is a competitive one. We want the oil pastel to win the battle and say "Don't go here paint! I was here first!" We can't wait for you to see the one of a kind frames, complete with the students picture inside! :)

We are now returning to a project we started and then paused while we completed the frames... Ocean Creature Mosaics! The students study oceans in 2nd grade, so it's such a fun way to connect what they learn! The students chose their own ocean creature (anything in the ocean that is living) and together we found a picture that they could use as a reference. We then studied mosaic artist Mary Wells who creates incredible mosaics made up of thousands of hand cut pieces of paper. We mimicked her art process of painting the background and then making the main subject of the artwork the mosaic. The students just started this step, but they are quickly realizing that it takes PATIENCE, PRECISION, and PRACTICE. This is the first time I am teaching this particular project, although I have taught mosaics in the past, including the fish mosaics that 3rd grade made (as part of the mural at St. Paul's fish market in Mequon)!


Third grade artists finished up their beautiful Holiday Lights Watercolor Paintings with the addition of the string. They got to choose either yarn or glitter to connect to the bases of the light bulbs. The project wasn't just a fun and eye catching artwork to create, it was also a great way to learn WHAT color families there are (primary, secondary, and tertiary) and HOW they are made, since the student themself had to hand mix secondary and tertiary colors. 

We are continuing to learn about color in the form of a new project, Warm and Cool Agamograph and Collagraph Prints! This is a two part project that will require the artists to make Collagraph prints (a warm version, a cool version, and a bonus print in which they can choose any colors they want) as well as an Agamograph which is a form of kinetic (moveable) art where the image changes depending on where you are looking. 

At this point, students have designed a Collagraph PLATE (like a stamp made with a COLLAGE of materials glued onto it). During the design process they were asked to create two designs, both non-representational or abstract (they couldn't do anything recognizable). They were painted with a layer of mod podge by some of my high school volunteers (former art students :) and are now ready to be printed! We look forward to showing you BOTH completed projects (the prints and the Agamograph) soon!


Fourth grade artists enjoyed seeing their finished Clay Coil Vessels after they were glaze fired in the kiln! The students worked a long time on the projects from beginning with pencil designs in their sketchbook, to making Seesaw posts to show off their completed projects and what they learned. The clay making unit involved many clay making skills, with the biggest emphasis on COILS (snake like pieces of clay that the students needed to roll out by hand). There are coil extruders that clay artists can use at higher levels, but in the elementary level, I believe it's important for the students to learn the basic skills and techniques with their own two hands. 

The 4th grade artists are now in the midst of one of the most challenging and rewarding art units they will take part in... portrait drawing! Actually, not just portrait drawing, SELF portrait drawing, which seems to be more intimidating for many and require even more of a GROWTH MINDSET! I tell the students that they are not alone in their hesitations and frustrations, because many ADULTS also make up their minds they that can't draw and drawing themself would be... well... painful for me to teach ;) So... our number one goal right now is to have that growth mindset and focus on the Studio Habit of Mind "Stretch and Explore" as we learn some really cool tips and tricks to drawing a realistic self portrait. Already, I have seen a great deal of progress and I can't wait to see how far they come when we wrap up the unit. Hopefully they don't forget all they learned!

In the pictures, you will see that the students started the unit by practicing each facial feature using help sheets and a mirror. I then had the students draw their first self portrait with NO HELP as a way to see what they can do and what they already know. Since football was a hot topic for many when I taught the lesson, I related it to training camp when the coach wants to see what you can do. My job as their "art coach" will be to see what they can do and help make it even better! I'm not sure if I convinced all of them, but at least they perked up when they heard football ;)

Following the first self portrait with no help, We drew "Self Portrait #2" which focused on: face shape (symmetrical and bigger on top - like an egg), gridlines (line of symmetry - which shows WHERE the facial features should go). Next class we will practice hair. We look forward to showing you their final self portraits soon!


Fifth grade artists are nearing the end (or at least over half way done, haha, it seems like it's taking forever) with their fibers unit! Once we spent a few classes getting comfortable with weaving, we jumped back into papermaking (in which 3 students can papermake at a time). We only have one more class to go with papermaking (yahoo!) and then each student will have created their own unique piece of paper. It is such a fun and interesting art making experience that every student enjoyed! When the outside of the weavings are complete, the students will receive back some of their handmade paper to sew into their weaving. The rest of their paper will be used for the cover of their sketchbooks and an additional artwork later in the year (we use it for 3 projects - so it's well worth the investment of time and energy)!

In the pictures you will see the students add their torn varieties of paper to the blender and fill it up with water. They can also add watercolor, crayon shavings, and glitter! These simple and easy additions make the paper so fun and unique. Even though there is some aspect of suprise with how it will blend together, the students are encouraged to plan ahead and think through how the colors will mix together. We talked about analogous colors (next to each other on the color wheel) being more desirable than complementary colors (opposite colors). Once the paper and water mixture was blended to make pulp, the artists poured it into a wooden frame with a mesh screen and plastic grid underneath. The papermaking devices allow the water to run through and the frame gives it a nice clean edge. We then evenly disperse the pulp and cover it with a cover screen so all of the water can be soaked out with a sponge. This is what flattens the paper and presses the fibers together. We hope you enjoy seeing the process and thank you SO VERY MUCH to their parent (and grandparent) volunteers that came in to help!!! I simply can't do it alone!